
Kitchen cabinet installation can seem a bit complex and intimidating at first, but you’ll find the actual live process of installing kitchen wall and base cabinets are relatively simple.

You will need to prepare the space, complete a few pre-installation tasks, and be reasonably handy with a drill and level…. and you’ll be well on your way to having a beautiful, new kitchen you can be proud of. When doing your cabinet installation… these easy-to-follow steps and tips on how to install cabinets can make putting your kitchen together quite fun!
So, when you’re ready, roll up your sleeves and get the project started by gathering all the tools and materials needed, then follow these basic steps.
Tools needed
4-foot level pencil
Screw gun wood shims
Stud finder
Drill
Tape measure 1 x 2 ledger board
2-½” screws Clamps
Before starting, look at these questions you may be asking yourself.
1. Can I install kitchen cabinets myself?
Absolutely! Read through each of these steps carefully before you start installing wall and base cabinets, and you should be good to go.
2. Where to start when installing cabinets?
Gather the tools needed and prepare your space according to the steps. Consulting with a professional before starting is a good idea to make sure you’re on the right track.
3. How long does it take to install kitchen cabinets?
For more tips on cabinet assembly, check out the step-by-step assembly videos from our sister company, CabinetCorp.
How to install wall cabinets
Steps
- Prepare the space using a 4-foot level, stud finder, tape measure, pencil, drill, screws, and a screw gun.
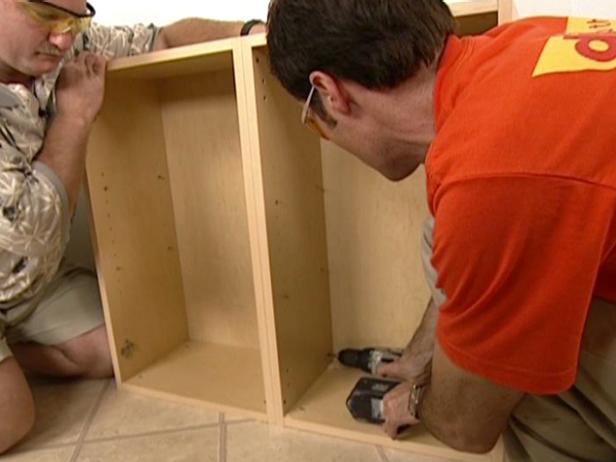
- Before measuring, marking, and installing the cabinets, remove the doors, hardware, and shelves from the cabinets with the drill (see tip 1).
- Measure the height of the base cabinets (34” above the floor), add in 1-½” for a standard countertop and 18” for the backsplash. Total should be 54” from the floor to the bottom of the wall cabinets (see tip 2).
- Using a pencil and level, draw a horizontal line across the wall using the 54-56” height measurement.
- Using a stud finder, drill, and pencil, locate the wall studs along the line, mark the locations, and drill a small hole to confirm the stud locations (see tip 3).

- With the screw gun and screws, attach the ledger board to the wall into the holes made for the studs.
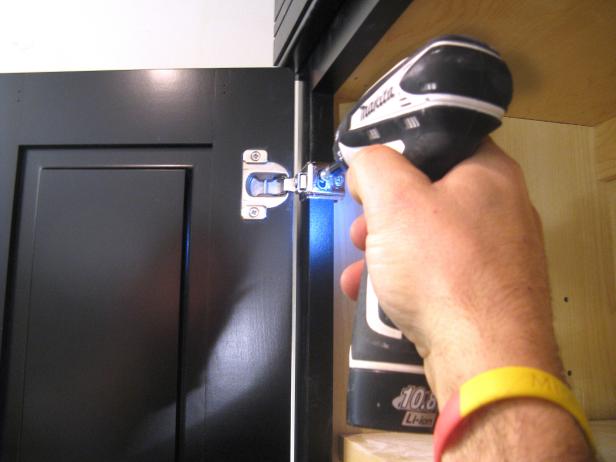
- Next, use the clamps to attach two wall cabinets at the stiles (the vertical face of the cabinet frames) and check for plumb, making sure the cabinets are straight up and down and are flush.
- Using the screw gun and screws, drill the cabinets together at the stile, both top and bottom in the front, and where the cabinets meet in the back.
- Carefully lift the cabinets up onto the ledger board, checking for plumb and level. If necessary, shim the cabinets with a wood shim.
- Next, secure the cabinets into the wall at the studs with the screw gun and screws whileyou continue to check for plumb and level.
- Repeat steps 7 – 10 with the remaining wall cabinets, checking for plumb and level and shimming the cabinets if necessary.
- Reattach the doors and hardware with the drill, and put the shelves back inside.
13. Remove the ledger board when finished with wall cabinet installation.
Tips for installing wall cabinets:
- Remove doors, hardware, and shelves from the cabinets to make them lighter and easier to install.
- If your floor isn’t level, measure from the highest point of the floor along the wall.
- Pay close attention to the position of all electrical wiring and plumbing during the preparation steps.
- If a gap exists between the wall and the last cabinet, use a shim to enclose the gap.
- Check for plumb and level throughout the entire process of installing the wall cabinets.
FAQ for installing wall cabinets:
What is the ledger board, and why do we need one?
A ledger board is used to support the weight of cabinets during installation temporarily.
How to install the kitchen base cabinets
Steps
- Prepare the space using a 4-foot level stud finder, tape measure, pencil, drill, screws, and a screw gun.
- Before measuring, marking, and installing the cabinets, remove the doors, hardware, and shelves from the cabinets with the drill (see tip 1).
- Find the highest point in the floor along with the wall where the base cabinets will be installed (see tip 2).
- Using the pencil, tape measure, and level, measure the base cabinets and mark a level line on the wall from the highest point in the floor to the cabinet height (see tip 3).
- Use the stud finder to locate and mark the studs along this line around the room.
- Dry fit, the first cabinet into place, checking for level across the top. Shim until level, if needed.

Tips for installing base cabinets:
- Remember to remove the doors, hardware, and shelves from the cabinets for easier installation.
- Start base cabinet installation as close to the highest point as possible. It’s easier to shim under the cabinet on the lower spots to make them level with this first one rather than starting on a low point.
- Use the level to assure this line will be a true horizontal and follow as a guide for installation.
- Check for level throughout the entire process of installing the cabinets.
FAQs for installing base cabinets:
Can I install base cabinets on concrete floors?
Yes, it is a good idea to install on concrete before installing your choice of flooring. Especially if you’re installing hardwood flooring, nstalling cabinets on concrete can help you avoid scratching or damaging the hardwood floor.
How much does it cost to install kitchen cabinets and countertops?
The cost ranges from $100 – $3,000 per linear foot depending on the size, design, and type of material chosen.
If you need help choosing kitchen cabinets and installation, Simply Kitchens is here to help with free, expert design and installation services. For more help with do-it-yourself installation,